|
WDC FreeSDK Download & Installation Guide
|
||
|
Step 1 The FreeSDK can be found on our Tools page. 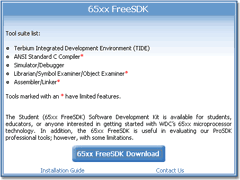 Click on the  button. button.Step 2 Fill in the web form. Note that required fields are marked by * red asterisks. 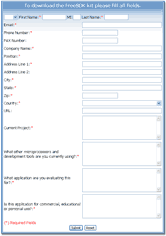 After completing the form click on the  button. button.Step 3 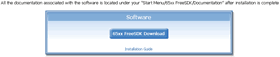 Click on the button.Step 4 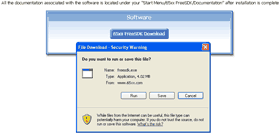 When the following popup appears choose  . .Step 5 The file should start to download. 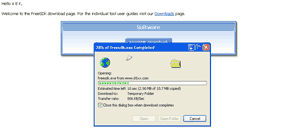 Step 6 When the file is downloaded the following window will appear. 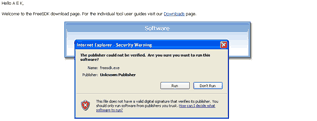 When the following popup appears choose .Step 7 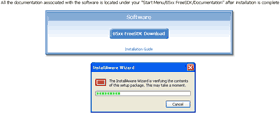 The installer will begin the setup. Step 8 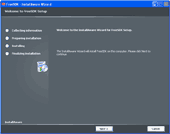 Select  . .Step 9 The end user agreement will appear. 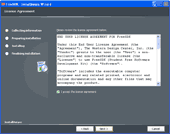 You must select  in order to continue. in order to continue.After this you can select Step 10 You can see the complete list of program information. 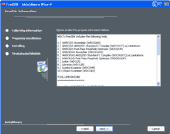 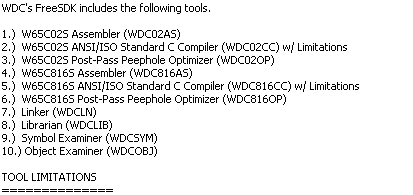 After reviewing select .Step 11 You can now choose to install the software for all computer users or just for the current profile. 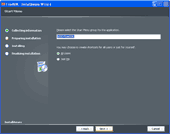  After making your selection choose .Step 12 The setup is now complete and ready to install the FreeSDK. 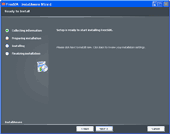 Select .Step 13 The program will start installing. Step 14 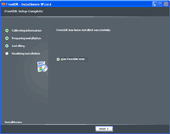 You should now choose to  to test the install. to test the install.Select  Step 15 The TIDE for FreeSDK software should now be running. 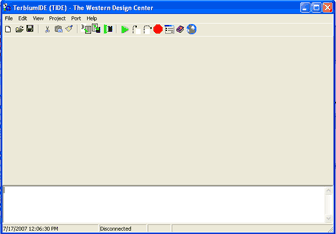 Step 16 The launch icon for TIDE is now located in your windows start menu, along with the TIDE User’s Guide. 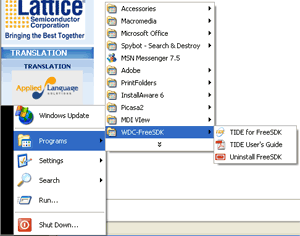 |